
 English
 中文简体
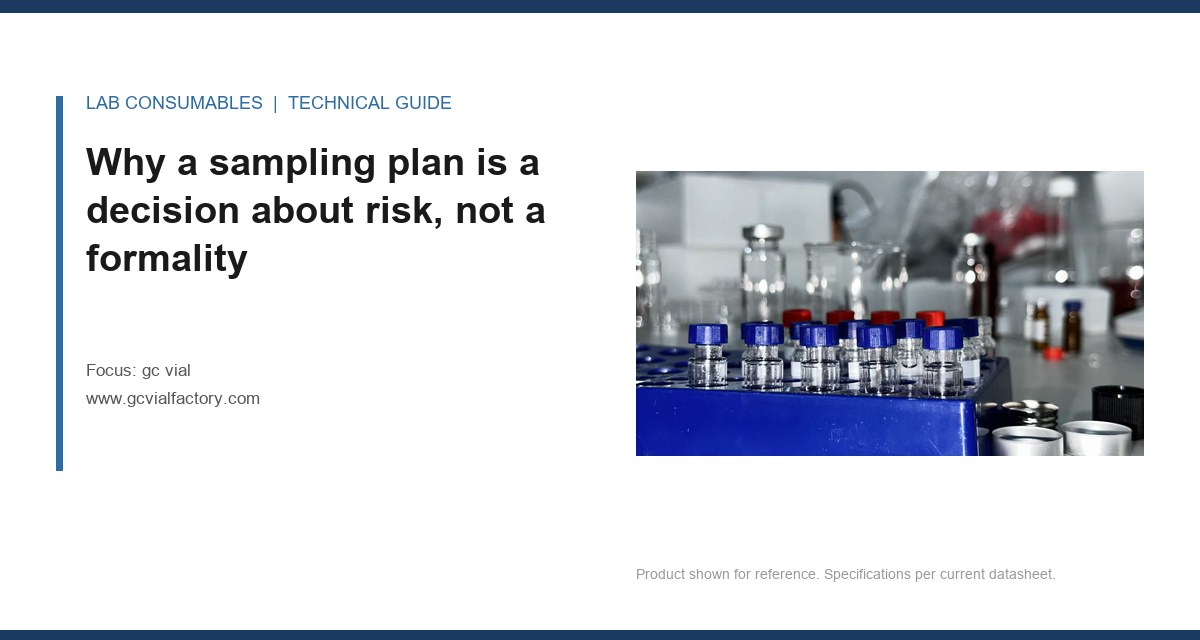
I have signed off on shipments that later failed at the customer’s autosampler, and every one of those failures traced back to a sampling plan that looked rigorous on paper but tested the wrong things. We were pulling ten vials per lot, measuring dimensions, crimping them, and calling it release. What we were not doing was testing the seal after the crimp, or checking septum penetration force on a needle that had already been through fifty injections. The plan passed the lot and the lot still failed. That experience reshaped how I build QC sampling plans for GC vials today, and it is the subject of this piece.
The angle here is narrow on purpose. Not what the factory controls on the line, not why the vial matters analytically, but the specific question of how many vials to pull, what to measure, at what acceptance limits, and how to structure an AQL plan that catches real defects without spending more on inspection than the vials are worth. This is the plan a procurement manager can put in a purchase order and a QC manager can defend in an audit.
Every sampling plan encodes a trade-off. Pull too few vials and you accept lots with defect rates that will hurt downstream. Pull too many and you either destroy the lot through destructive testing or you spend more on inspection labor than the lot is worth. The number that matters is not the sample size in isolation. It is the combination of sample size, acceptance number, and the defect rate you are willing to let through.
For GC vials, I work with three defect classes, and each gets a different plan. Critical defects cause analytical failure or safety issues: cracked necks, septa with visible holes, closures that will not seal. Major defects degrade performance but do not stop the run: dimensional drift on crimp geometry, out-of-tolerance septum thickness, particulate above the visual limit. Minor defects are cosmetic: label misalignment, minor scuffing on the glass body. The plans differ because the consequences differ.
The reference frame most defensible in an audit is ANSI/ASQ Z1.4 (the successor to MIL-STD-105E), which ties sample size to lot size and acceptance number to an AQL. For a lot of 10,000 vials, general inspection level II gives a sample size of 200. At AQL 0.65 for critical defects, the acceptance number is 3. At AQL 1.5 for major defects, the acceptance number is 7. Those numbers are not arbitrary. They come from the operating characteristic curves and they reflect the probability of accepting a lot at a given defect rate.
I have seen factories argue for a fixed sample of 32 vials regardless of lot size. That works when lot size is stable and small. It fails when the same plan is applied to a 500-vial lot and a 50,000-vial lot, because the risk profile is completely different. The plan has to scale with the lot.
What “lot” actually means for a molded vial
A lot is not a shipment. It is a single production run from a single mold, on a single machine, using a single resin batch. If the factory runs two shifts on the same mold with the same resin, that is two lots for sampling purposes because shift-to-shift variation in the molding process is real. If the factory changes resin lots mid-run, that is a new lot. If the factory changes mold cavities, that is a new lot.
The reason this matters for the sampling plan is that defects cluster. A single bad cavity in a 16-cavity mold produces roughly 6% defectives in the lot, but the defective vials are not randomly distributed. They come from one cavity. Random sampling across the lot will catch them if the sample is large enough, but the sample size needed to catch a 6% defect rate with 95% confidence is 49 vials if you accept zero defects. That is the number I use as a floor for cavity-level defect screening on a new mold or a mold that has just been serviced.
What the incoming inspection should actually measure
I have seen QC sheets with forty checkboxes, and the operator ticks them without measuring anything. The plan has to be short enough to be done properly. Here is the list I actually run, with the specific instruments and acceptance limits.
Dimensional checks
- Body OD: measured with a digital caliper at three points around the circumference, 90 degrees apart. For a standard 12 x 32 mm vial, nominal OD is 12.00 mm, tolerance ±0.20 mm. Out-of-round above 0.15 mm is a major defect because it causes autosampler gripper misalignment.
- Body height: nominal 32.00 mm, tolerance ±0.30 mm. Height drift above 0.5 mm causes the needle to bottom out or miss the septum entirely on fixed-height autosamplers.
- Neck OD at the crimp ring: nominal 11.00 mm for a standard 11 mm crimp finish, tolerance ±0.10 mm. This is the single most important dimension for seal integrity because the crimp tool closes around this ring.
- Neck ID: nominal 6.00 mm, tolerance ±0.15 mm. Too large and the septum sits loose. Too small and the needle guide scrapes.
- Bottom concavity: measured with a depth gauge. Nominal 0.50 mm for a flat-bottom vial, tolerance ±0.20 mm. Concavity variation above 0.3 mm causes the vial to wobble in the autosampler tray.
Septum and closure checks
The septum is where most field failures originate, so it gets its own inspection block. For a standard 11 mm silicone/PTFE septum:
- Thickness: nominal 1.00 mm, tolerance ±0.10 mm. Thickness below 0.85 mm reduces reseal capability and puncture count.
- Diameter: nominal 11.00 mm, tolerance ±0.10 mm. Undersize septa fall out of the cap during crimping.
- PTFE facing integrity: visual at 10x magnification. Any pinhole, wrinkle, or delamination is a critical defect. A pinhole in the PTFE facing exposes the sample to silicone, which is a contamination source and a source of siloxane peaks on the chromatogram.
- Durometer: measured on a Shore A tester, nominal 45 ± 5 for standard silicone. Harder septa resist coring but increase needle penetration force and can cause needle bending on thin-gauge needles.
Functional checks that catch what dimensions miss
Dimensions alone will not predict field performance. Three functional tests do more work than the entire dimensional block.
Seal integrity after crimp: crimp ten vials to the specified torque (for an 11 mm aluminum crimp, that is typically 1.2 to 1.5 N·m on a manual crimper, or 0.6 to 0.9 bar on a pneumatic crimper), then pressurize each with 0.5 bar of nitrogen and immerse in water. Any bubble stream is a critical defect. I have run this test on lots that passed dimensional inspection and found 8% leak rates from a single bad crimp ring batch.
Puncture force and reseal: use a force gauge with a 23-gauge needle at 50 mm/min crosshead speed. Penetration force should be 1.5 to 3.5 N for a standard silicone septum. Reseal test: puncture the same septum 50 times at different points and check for leakage at 0.5 bar. A septum that leaks before 30 punctures is a major defect. I have seen cheap septa fail at 12.
Extractable screening: this is the test most QC plans skip, and it is the one that matters for trace analysis. Take ten vials, fill each with 1.0 mL of HPLC-grade isooctane, cap, and heat at 60°C for 30 minutes. Inject 1 µL on a GC-FID with a 30 m x 0.25 mm x 0.25 µm nonpolar column. Any peak above 5% of the analyte peak area at the retention time of interest is a fail. This catches contaminated resin batches and residual mold release agents that dimensional testing never sees.
If you are sourcing vials for HPLC alongside GC, the same extractable logic applies to the HPLC autosampler vial line, and the acceptance limits are tighter because UV detection at 210 nm sees more than FID does.
Building the AQL table for a real purchase order
Here is the decision table I put in purchase orders. It is not theoretical. It is the table I have used to reject lots and to defend acceptance of lots that looked marginal but performed fine in the field.
| Defect class | Example | Test method | AQL | Sample (10k lot) | Accept | Reject |
|---|---|---|---|---|---|---|
| Critical | Cracked neck, PTFE pinhole, seal leak | Visual 10x, pressure test | 0.25 | 200 | 1 | 2 |
| Major (dimensional) | Neck OD out of tolerance, height drift | Caliper, 3 points | 1.0 | 200 | 5 | 6 |
| Major (functional) | Puncture force high, reseal fail <30 | Force gauge, pressure | 1.0 | 32 | 1 | 2 |
| Minor | Label misalignment, scuffing | Visual | 2.5 | 200 | 10 | 11 |
The functional block uses a smaller sample because the tests are destructive and slower. Thirty-two vials is enough to detect a 10% defect rate with 95% confidence at zero acceptance. That is the right trade-off for tests that take 30 minutes each versus dimensional checks that take 30 seconds.
Switching rules and reduced inspection
A static plan is wasteful. ANSI/ASQ Z1.4 includes switching rules: after 10 consecutive lots accepted at normal inspection, you move to reduced inspection with sample size cut by 40% and the same acceptance number. After any rejection, you return to normal, and after 5 consecutive lots rejected, you move to tightened inspection with sample size increased by 60% and a lower acceptance number. Most factories I have audited do not implement switching rules. They run the same plan forever, which means they over-inspect good suppliers and under-inspect struggling ones.
The pre-shipment audit that supplements lot sampling
Lot sampling catches defects within a lot. It does not catch the failure mode where the factory ships the right vials in the wrong boxes, or ships a lot that passed QC but sat in a hot warehouse for six weeks before dispatch. Pre-shipment audit is a separate step and it happens after the lot is packed.
Packaging and storage verification
I check three things at pre-shipment. First, the seal on the inner bag: a heat-sealed foil bag with a desiccant sachet, not a zip-lock. Vials stored in unsealed bags pick up ambient moisture, and moisture on the glass surface causes autosampler gripper slippage. Second, the carton drop test: drop one carton from 1.2 m onto a concrete floor and inspect for cracked vials. A carton that fails this test will fail in transit. Third, the storage temperature record: if the factory cannot produce a temperature log for the last 30 days showing the warehouse stayed below 30°C, I treat the lot as suspect and pull a fresh sample for reseal testing.
The same storage logic applies to any reagent bottle shipped alongside the vials. If the two are stored in the same warehouse, the temperature control question is the same question.
Traceability check
Every carton should carry a lot number that resolves to a production record with the mold ID, resin batch, shift, and QC sign-off. I ask for three cartons at random and trace each lot number through the factory’s system. If any one of them fails to resolve, the traceability system is broken and the sampling plan has no foundation because you cannot act on a rejection if you cannot identify the affected lot.
Where sampling plans actually fail in practice
I have audited enough factories to see the same failure patterns repeat. Here are the ones that matter, with the fix.
Failure 1: sampling only from the top of the carton
The operator opens the carton, pulls vials from the top layer, and closes it. Vials from the bottom layer, which took the most handling and the most compression, never get inspected. Fix: sample from top, middle, and bottom layers in equal proportion. For a 200-vial sample from a 10,000-vial lot packed in 20 cartons, pull 10 vials from each of 20 cartons, and within each carton pull from three layers.
Failure 2: testing before crimping
Dimensional checks on an uncrimped vial tell you nothing about the seal. The crimp is where the failure happens, and the crimp ring dimension is what determines whether the crimp tool seats correctly. Fix: crimp the sample before dimensional and functional testing. The vial that gets measured should be the vial that would go to the customer.
Failure 3: no reference standard
The operator measures a neck OD and gets 11.08 mm. Is that a pass? Only if there is a written tolerance. Without one, the operator either passes everything or fails everything. Fix: every measurement on the QC sheet needs a nominal, an upper limit, and a lower limit printed next to it. No exceptions.
Failure 4: skipping the extractable screen on “proven” suppliers
The supplier has been good for two years, so the extractable screen gets dropped to save time. Then the supplier changes resin vendors to save cost, and six months later the customer’s trace analysis starts showing siloxane peaks. Fix: run the extractable screen on the first lot of every quarter regardless of supplier history, and on every lot after any process change notification.
Failure 5: treating the AQL as a target
The lot comes in at 4 defectives against an acceptance number of 5, so it passes. Next lot comes in at 5, so it passes. The defect rate creeps up and nobody notices because the plan keeps accepting. Fix: track the actual defect rate per lot over time and set an internal action limit at half the AQL. When the running average crosses that line, escalate to the supplier before the plan starts rejecting.
A troubleshooting checklist for lots that fail QC
When a lot fails, the first question is whether the defect is real or the test is wrong. Here is the sequence I run.
- Re-measure with a second instrument. Calipers drift. Force gauges need calibration. Confirm the failure on a second instrument before rejecting the lot.
- Re-sample from a different carton. If the second sample passes, the failure is clustered, which points at a specific cavity or a specific carton. That is a different corrective action than a lot-wide failure.
- Check the crimper. A seal failure on 8% of crimped vials is more likely a crimper calibration issue than a vial issue. Verify crimper torque against the manufacturer’s spec (typically 1.2 to 1.5 N·m for an 11 mm manual crimper) before blaming the vial.
- Check the septum batch. If reseal failures cluster, pull the septum batch record and check durometer and thickness against the certificate of analysis. A septum batch that is 5 Shore A harder than nominal will fail reseal at 20 punctures instead of 50.
- Check the resin batch. If dimensional failures cluster, the resin lot may have different shrinkage characteristics. Molded glass and plastic both shrink on cooling, and a resin batch with 0.3% different shrinkage moves every dimension by 0.03 to 0.05 mm.
- Check storage conditions. If failures appear only on lots that shipped in summer, the warehouse temperature log is the first place to look.
For reference on what the autosampler side expects, the Agilent chromatography consumables and columns documentation and the Thermo Fisher chromatography and sample handling resources both publish autosampler tray geometry and gripper force specs that constrain the vial dimensions. If your acceptance limits do not match those specs, the plan is testing the wrong numbers.
What the plan should look like on a purchase order
The plan only works if it is in the contract. Here is the language I put in a purchase order for GC vials, and it is short enough that suppliers actually read it.
Sampling: ANSI/ASQ Z1.4, general inspection level II, normal inspection, with switching rules per the standard. Critical defects AQL 0.25, major dimensional defects AQL 1.0, major functional defects AQL 1.0 on a 32-piece functional sample, minor defects AQL 2.5.
Test methods: dimensional per the drawing tolerances; seal integrity by 0.5 bar nitrogen pressure test on 10 crimped vials per lot; puncture force and reseal per the 23-gauge needle protocol at 50 mm/min; extractable screen by GC-FID on 10 vials per quarter and after any process change.
Traceability: every carton carries a lot number resolving to mold ID, resin batch, shift, and QC sign-off. Failure to resolve is a lot rejection.
Storage: vials shipped in heat-sealed foil bags with desiccant; cartons pass a 1.2 m drop test; warehouse temperature log available on request, maximum 30°C.
Nonconformance: any critical defect triggers lot rejection and a corrective action request within 5 business days. Any major defect above the acceptance number triggers a 100% inspection at the supplier’s cost or a return at the supplier’s cost.
That language is defensible in an audit and specific enough that a supplier cannot argue about interpretation. It also gives the QC manager a clear basis for action when a lot fails, which is the real test of any plan.
What to require from the supplier’s own QC
The customer’s incoming inspection is a check, not a substitute for the supplier’s outgoing inspection. I require three documents with every shipment. A certificate of analysis with the actual measured values for the critical dimensions and septum properties, not just “pass.” A certificate of conformance referencing the drawing revision and the standard. And a nonconformance log for the last 12 months, summarized by defect class. If the supplier cannot produce the third document, the first two are unverifiable.
For the wider document set that should accompany a consumable shipment, the same logic applies across the GC vial line and to any sample vial sourced for the same workflow.
Calibrating the plan against real field data
A sampling plan that has never been validated against field performance is a guess. The way to validate it is to track the correlation between incoming inspection results and downstream failures over 12 months. If lots that passed incoming inspection are failing at the autosampler, the plan is testing the wrong things or the acceptance limits are too loose. If lots that failed incoming inspection would have performed fine, the limits are too tight and you are paying for inspection labor that buys nothing.
I run this correlation annually. The last time I did it, the data showed that seal integrity after crimp was the single best predictor of field failure, and that dimensional checks on the vial body were nearly useless on their own. The plan changed as a result: fewer dimensional checks, more functional checks, and the extractable screen moved from annual to quarterly. The total inspection cost went down because the functional tests are faster than the full dimensional block.
For method-level context on what the downstream analysis actually requires, the U.S. EPA SW-846 test methods for waste and materials and the Restek technical resources for chromatography both document the sample handling tolerances that the vial has to meet. Those are the numbers the sampling plan should be anchored to, not the drawing tolerances alone.
Takeaway
A QC sampling plan for GC vials is a risk decision dressed up as a procedure. The sample size, acceptance number, and test methods all encode a judgment about which defects matter and how much inspection is worth paying for. The plan that works is short enough to execute properly, specific enough to defend in an audit, and calibrated against real field failures rather than drawing tolerances alone. If your current plan measures forty dimensions and never crimps a vial, you are inspecting the wrong object. Crimp the sample, pressurize it, puncture it fifty times, and run the extractable screen. Those four tests will catch more field failures than any dimensional block you can write.
References & further reading
Related resources from our lab consumables network:
- Gc Vial at gcvialfactory.com
- Reagent Bottle at reagentbottleforsale.com
- Hplc Autosampler Vial at hplcautosamplervials.com
- Sample Vial at samplevialprice.com
External references and standards: