
 English
 中文简体
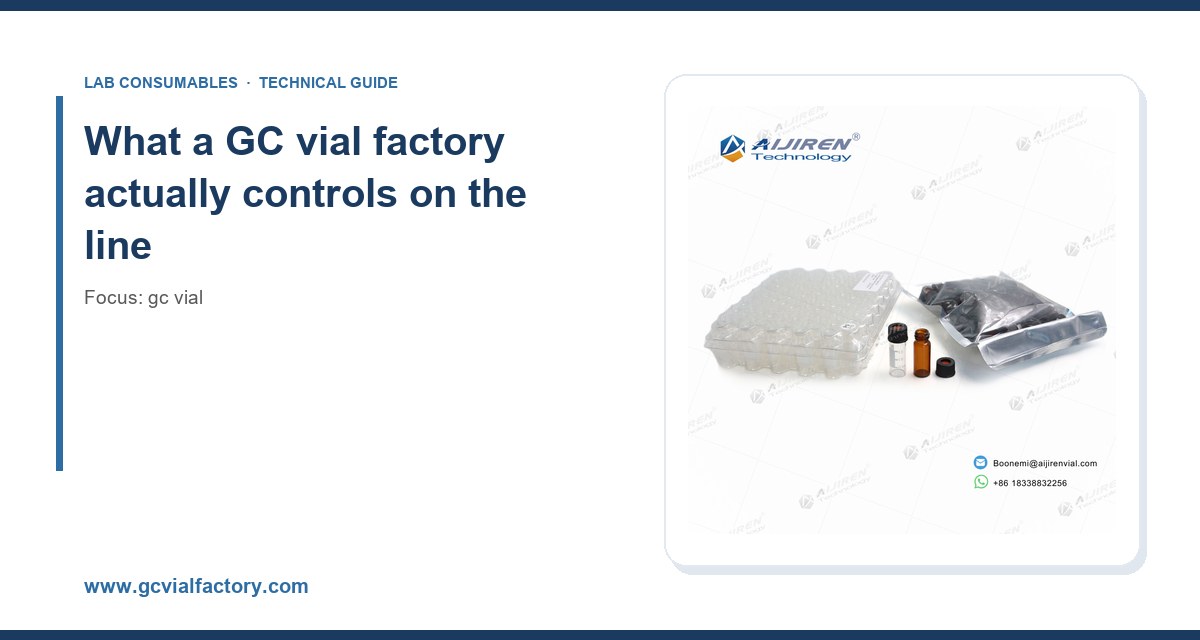
I spent four years running QA on a GC vial line, and the thing that surprised me most was how much of the final product is decided by settings nobody outside the plant ever sees. The glass dimensions are fixed by the mold drawing. The septa are bought to a spec. What actually moves the defect rate from 4% to 0.3% is the stuff on the line: the annealing curve, the wash cycle, the torque on the capper, the way a lot of 500 gets sampled. That is what a factory controls, and it is what you should be asking about when you audit a supplier or write an OEM contract.
This article walks through each control point in the order a vial moves through the plant, with the numbers I have used and the failure modes each one prevents. If you are writing a purchase spec or preparing for a supplier audit, this is the list to bring with you.
A GC vial is a small assembly: a borosilicate glass body, a crimp or screw finish, a septum, and a cap. Each of those has a tolerance. Each tolerance has a process that produces it. A factory that only inspects the finished vial is controlling the outcome, not the process. A factory that controls the line is controlling the inputs that make the outcome repeatable.
The line controls I care about, in sequence, are these:
- Glass tubing incoming inspection (ID, OD, wall, coefficient of expansion)
- Forming and mold wear management
- Annealing and residual stress
- Dimensional inspection at the finish (crimp or thread)
- Washing and depyrogenation
- Septa lot release and lot-to-lot consistency
- Capping torque and crimp geometry
- Final AQL sampling and packaging
I will take each in turn. The numbers below are the ones I have used on the floor and in supplier specs. Yours may differ slightly, but the structure should be the same.
Incoming glass tubing and the coefficient of expansion
Most 2 mL GC vials are drawn from borosilicate tubing in the 11 mm or 12 mm OD range, typically 1.0 mm or 1.1 mm wall, cut to length. The tubing spec that matters most is the coefficient of thermal expansion (CTE). Type I borosilicate (borosilicate 3.3) sits around 3.3 × 10⁻⁶ /K. Type II (soda-lime treated) sits higher. For a GC vial that will see autosampler tray temperatures, a heated injector, and possibly a hot wash, CTE matters because it drives how the vial behaves under thermal cycling and how well the septum seats against the finish.
What I check on incoming tubing: OD tolerance within ±0.10 mm, wall within ±0.05 mm, and a certificate of analysis that names the glass type. A lot that drifts outside those bands shows up later as capping failures or autosampler gripper misses. I have seen a 0.15 mm OD drift cause a 2% pick-up error on a tray of 100 because the gripper could not seat the vial squarely.
If you are buying an GC vial from an OEM, ask for the tubing COA and the incoming inspection record for the last three lots. If they cannot produce it, they are buying glass on price and inspecting on the back end.
Forming and mold wear
The vial body is formed in a mold. The mold wears. A worn mold produces vials that are slightly oval, slightly tapered, or slightly off in the neck. Ovality is the one that bites. An autosampler gripper that expects a round 11.6 mm body will drop or crush an oval one. A crimp tool that expects a concentric neck will produce a leaky seal on an eccentric one.
What the line controls: a mold wear log with a defined replacement interval, plus a dimensional check every shift on a sample of formed vials. The check I use is OD at three heights (top, middle, bottom) to ±0.05 mm, plus a concentricity check on the neck. When the spread between top and bottom OD exceeds 0.10 mm, the mold is due for replacement or rework.
This is the point where a cheap vial and a good vial start to separate. The cheap line runs the mold until it fails. The good line replaces on schedule and eats the tooling cost.
Annealing and residual stress
Glass that is formed and cooled too fast carries residual stress. Stress shows up as cracking during capping, cracking during autosampler handling, or a vial that fails in the injector port. The line controls this with an annealing lehr: a controlled cool through the annealing point of the glass, typically in the 560 to 580 °C range for borosilicate 3.3, with a defined ramp down.
The check is a polariscope inspection on a sample from each shift. Residual stress shows up as colored bands under crossed polarizers. A vial with visible stress bands is a vial that will crack. I have seen a lot of 2,000 with a 6% stress-related crack rate because the lehr belt speed was bumped to catch up on a backlog. That is a line control failure, not a glass failure.
Ask for the lehr temperature profile and the polariscope inspection record. If the answer is “we do not do that,” the vial is a gamble.
Dimensional inspection at the finish
The finish is the top of the vial: the crimp bead or the screw thread. This is where the septum seats and the cap grips. The tolerances here are tight because the cap and crimp tool are fixed geometry.
For a 11 mm crimp finish, the crimp bead OD is typically held to 11.00 ±0.15 mm, and the bead height to 1.00 ±0.10 mm. For an 8-425 screw finish, the thread major diameter is held to 8.00 ±0.10 mm, and the thread pitch is fixed at 1.0 mm. For a 9 mm screw finish, the major diameter is 9.00 ±0.10 mm.
What the line controls: a go/no-go gauge check on every shift, plus a full dimensional audit on a sample of 30 from each lot. A finish that is 0.2 mm oversize produces a cap that will not seat. A finish that is 0.2 mm undersize produces a cap that leaks. Neither shows up until the customer runs the tray.
If you are running an HPLC autosampler vial on the same line family, the finish controls are the same logic with different numbers. The point is that the factory owns the gauge and the interval.
Washing and depyrogenation
A GC vial that ships “clean” is a vial that has been washed to a defined standard and verified. The line controls this with a validated wash cycle: typically a detergent wash, a series of DI rinses, and a drying step. For vials that will hold trace-level analytes, the wash is followed by a solvent rinse and a low-temperature bake.
The numbers I use: final rinse water conductivity below 1 µS/cm, and a residue check on a sample of vials from each wash lot. The residue check is a solvent extract analyzed by GC-MS or LC-MS against a defined threshold (often < 0.1 µg/vial for total extractables, tighter for specific analytes). For pharma-facing supply, the wash is often validated to a depyrogenation standard with a 3-log endotoxin reduction.
The failure mode here is a wash cycle that drifts. Detergent concentration drops, rinse water quality drifts, the bake temperature falls off. A factory that does not trend the wash parameters is a factory that ships a clean vial on Monday and a contaminated one on Friday.
Septa lot release
The septum is the part of the vial assembly that touches the sample and the needle. It is also the part with the widest lot-to-lot variation, because it is an elastomer. The line controls this with a lot release spec that covers:
- Hardness (Shore A), typically 45 to 55 for a standard silicone septum, softer for a low-puncture-force grade
- Thickness, typically 1.0 mm or 1.3 mm for an 11 mm crimp, held to ±0.05 mm
- Puncture count before coring or leakage, typically 3 to 5 punctures for a standard silicone, higher for a PTFE-faced or a high-purity grade
- Extractable profile, checked by solvent extract and GC-MS
- Compression set, the tendency to take a permanent deformation after capping
The puncture count is the number I watch. A septum that cores at puncture 2 will drop a fragment into the sample and plug the needle. A septum that holds to puncture 5 is a different product. The line should verify puncture count on every septum lot, not just the first.
If you are comparing suppliers, ask for the septum lot release record and the puncture count method. A supplier who cannot name the method is a supplier who is not testing.
Capping torque and crimp geometry
This is the control most people miss. A screw cap that is under-torqued leaks. A screw cap that is over-torqued deforms the septum and can crack the finish. The line controls this with a torque setting on the capper and a torque check on a sample from each shift.
For an 8-425 screw cap, I set the capper to 0.6 to 0.9 N·m and verify on a sample of 10 per shift with a torque tester. For a 9 mm screw cap, the range is 0.8 to 1.2 N·m. For a 13-425 cap on a larger vial, 1.0 to 1.5 N·m. These are starting points; the right number depends on the septum thickness and the cap material.
For a crimp cap, the control is the crimp geometry: the crimp tool should produce a uniform fold over the bead, with the septum compressed evenly. The check is a visual and a pull test. A crimp that is too loose leaks. A crimp that is too tight cracks the glass at the bead. I have seen a crimp tool out of adjustment produce a 3% crack rate at the bead, all of it invisible until the vial hit the injector.
The line should log the torque setting and the crimp tool adjustment for every lot. If you are auditing, ask to see the log.
Final AQL sampling and packaging
The last control is the sampling plan. A factory that inspects 5 vials from a lot of 10,000 is not controlling anything. The plan I use is ANSI/ASQ Z1.4, general inspection level II, AQL 0.65 for major defects and 1.5 for minor. Major defects are dimensional failures, cracks, and capping failures. Minor defects are cosmetic.
The sample is drawn from across the lot, not from the top of the carton. The inspection covers dimensions, visual, and a functional check (cap fit, septum seat, autosampler pick-up). The record goes with the lot.
Packaging is a control too. A vial that survives inspection and then ships in a carton that crushes in transit is a vial that fails at the customer. The line controls the carton spec, the partition, and the pallet pattern.
What the line controls map to in your method
Each line control maps to a failure mode you will see in your lab. This is the table I use when I train new buyers:
- Glass CTE and wall tolerance → autosampler pick-up errors, gripper misses, cracked vials in the tray
- Mold wear and ovality → cap fit failures, leaky seals, inconsistent crimps
- Annealing and residual stress → cracked vials at the bead, vials that fail in the injector
- Finish dimensions → caps that will not seat, caps that leak, torque drift
- Wash and depyrogenation → ghost peaks, baseline drift, false positives at trace levels
- Septa lot release → coring, needle plugging, extractable peaks, puncture failures
- Capping torque and crimp geometry → leaks, septum deformation, cracked finishes
- AQL sampling → the defect rate you actually receive
If you are writing an OEM spec, this is the list to put in the contract. If you are auditing, this is the list to ask for records on. If you are troubleshooting, this is the list to work backward from.
A comparison checklist for supplier audits
Here is the checklist I bring to a supplier audit, with the numbers I expect to see. A supplier who can produce records for most of these is a supplier who controls the line. A supplier who cannot is a supplier who controls the invoice.
- Glass tubing COA: borosilicate 3.3, CTE 3.3 × 10⁻⁶ /K, OD ±0.10 mm, wall ±0.05 mm
- Mold wear log: replacement interval defined, OD spread across heights < 0.10 mm
- Annealing record: lehr profile 560 to 580 °C, polariscope inspection per shift
- Finish gauge record: go/no-go per shift, 11.00 ±0.15 mm crimp bead, 8.00 ±0.10 mm screw major diameter
- Wash validation: final rinse < 1 µS/cm, extractables < 0.1 µg/vial, 3-log endotoxin reduction if pharma-facing
- Septa lot release: Shore A 45 to 55, thickness ±0.05 mm, puncture count 3 to 5, extractable profile
- Capping torque log: 0.6 to 0.9 N·m for 8-425, 0.8 to 1.2 N·m for 9 mm, per-shift verification
- Crimp tool log: adjustment record, pull test, visual
- AQL plan: Z1.4 level II, AQL 0.65 major / 1.5 minor, sample across lot
- Packaging spec: carton, partition, pallet pattern
Score each item as present, partial, or absent. A supplier with eight present and two partial is a supplier you can work with. A supplier with four absent is a supplier who will cost you more in troubleshooting than they save on price.
Operational precautions on your side
The line controls the vial. You control what happens after it arrives. A few precautions that keep the line investment from being wasted:
- Store septa in the original packaging, sealed, at 15 to 25 °C. Silicone picks up volatiles from the air. An open bag of septa on a bench for a week is a bag of septa with a new extractable profile.
- Do not re-torque a screw cap. The septum takes a compression set. A re-torqued cap leaks at a different rate than a factory-torqued cap.
- Check the crimp tool on your side. A crimper that is out of adjustment will undo a good factory crimp. Verify the crimp geometry on a sample from each new box.
- Run a system suitability check with a known standard on each new lot. This catches a wash or septum drift before it shows up in your data.
- Keep the lot number with the data. When a ghost peak appears, the first question is which lot. A lab that cannot answer that question is a lab that will chase the wrong cause for a week.
If you are also buying larger containers for standards and mobile phases, the same logic applies to the reagent bottle you draw from. A clean vial filled from a contaminated bottle is a contaminated vial.
Troubleshooting checklist
When a GC run goes wrong and the vial is a suspect, work through this list in order. Each item maps to a line control above.
- Ghost peaks or baseline drift: check the septum lot and the wash record. Run a blank vial from the same lot. If the blank shows the peak, it is the vial or the septum, not the column.
- Needle plugging or coring: check the septum puncture count and the needle gauge. A 23-gauge needle through a 1.0 mm septum at 5 punctures is a different risk than a 26-gauge at 3.
- Leaks at the cap: check the capping torque and the finish dimensions. A leak at the cap is a torque or a finish problem, not a septum problem.
- Cracked vials at the bead: check the annealing record and the crimp tool. A crack at the bead is a stress or a crimp problem.
- Autosampler pick-up errors: check the OD tolerance and the mold wear log. An oval vial is a gripper miss.
- Inconsistent peak areas across a tray: check the septum lot and the capping torque. A septum that is compressed unevenly produces an uneven injection volume.
- False positives at trace levels: check the wash record and the septum extractable profile. A vial that was not washed to spec is a vial that contributes to the chromatogram.
For method-specific guidance on what a blank should look like, the U.S. EPA SW-846 test methods are a useful reference for the blank and calibration structure, and the Restek technical resources have good practical notes on vial and septum selection. The instrument vendors publish their own consumable specs: Agilent chromatography consumables and columns and Thermo Fisher chromatography and sample handling both list the dimensional and material specs their autosamplers expect. Match your vial spec to the instrument spec, not the other way around.
Recommendation
If you are specifying a GC vial for a method that matters, write the line controls into the purchase spec. At minimum:
- Borosilicate 3.3 glass, CTE 3.3 × 10⁻⁶ /K, OD ±0.10 mm, wall ±0.05 mm
- 11 mm crimp finish, bead 11.00 ±0.15 mm, or 8-425 screw finish, major diameter 8.00 ±0.10 mm
- Septum Shore A 45 to 55, thickness 1.0 ±0.05 mm, puncture count ≥ 3, extractable profile on file
- Wash validated to final rinse < 1 µS/cm and extractables < 0.1 µg/vial
- Capping torque 0.6 to 0.9 N·m (8-425) or 0.8 to 1.2 N·m (9 mm), verified per shift
- AQL Z1.4 level II, 0.65 major / 1.5 minor, sample across lot
- Lot traceability from tubing to carton
Ask for the records on the first three lots and on a random lot six months later. A supplier who can produce both is a supplier who controls the line. A supplier who can only produce the first is a supplier who controls the audit.
If you are buying a sample vial on price alone, you are buying the outcome of a line you have not seen. The line controls are what you are actually paying for. Get them in writing, get the records, and check them against the numbers above. That is the difference between a vial that works and a vial that costs you a week of troubleshooting.
The short version: a GC vial factory controls glass, molds, annealing, finish dimensions, washing, septa, capping, and sampling. Each has a number. Each number has a record. If the record is not there, the control is not there. Write the numbers into the spec and audit against them, and the defect rate you receive will match the defect rate the line is actually holding.
References & further reading
Related resources from our lab consumables network:
- Gc Vial at gcvialfactory.com
- Reagent Bottle at reagentbottleforsale.com
- Hplc Autosampler Vial at hplcautosamplervials.com
- Sample Vial at samplevialprice.com
External references and standards: