
 English
 中文简体
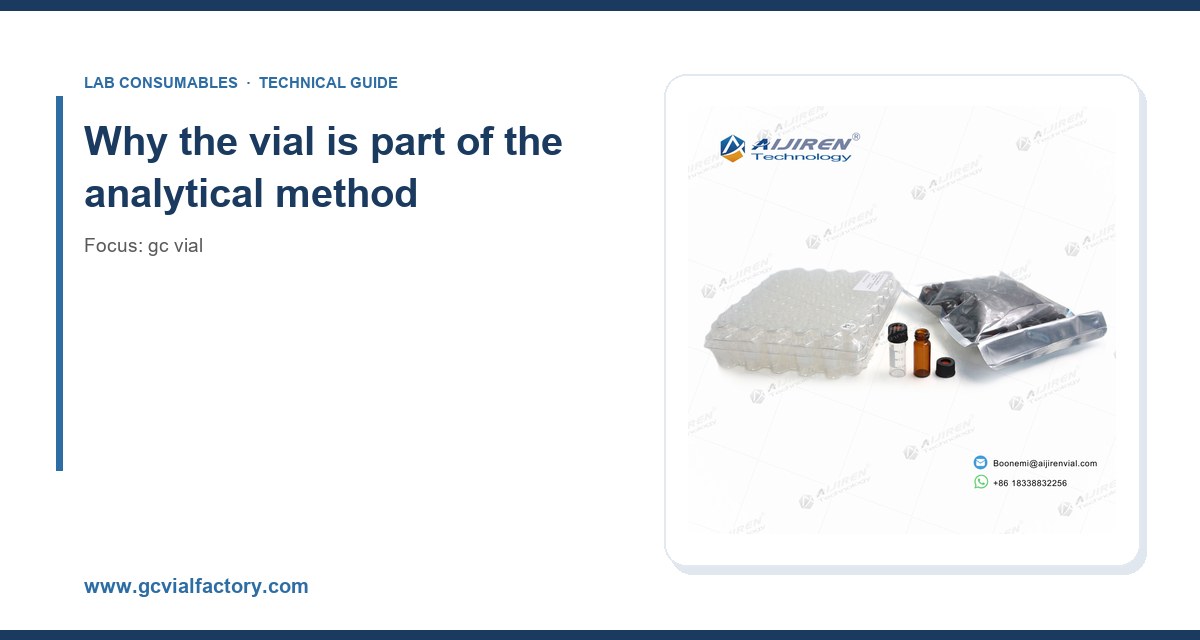
I have seen a septum fail on a Friday afternoon and take a $40,000 sequence down with it. The vial looked fine. The crimp looked fine. What failed was a 10 mm butyl septum that had been punctured about 90 times by a 23-gauge needle, and it started coring into the inlet. That is the moment I stopped buying GC vials by the case price alone. This guide is what I wish I had handed to my own procurement team years ago: the specs that matter, the numbers to put on a purchase order, and the failure modes that cost you more than the glass ever will.
A GC vial is not a passive container. It is the last thing the sample touches before it enters the inlet, and it is the first place where a method can quietly drift. Volatilization from a loose crimp, adsorption onto a dirty glass surface, septum coring, and headspace equilibration all happen in that 2 mL of space. When a method fails USP <621> system suitability on repeatability with an RSD above 2.0% for five injections, the autosampler and the column usually get blamed first. In my experience the vial and the cap are implicated more often than people admit.
The practical consequence: treat the vial, cap, and septum as a single consumable line item with its own specification, not as generic lab glass. The rest of this guide walks through what to specify, in the order I would actually decide it.
Start with the instrument, not the catalog
Every vial decision begins with the autosampler tray. Get the exact model, then look up its carrier and gripper geometry. The differences are not cosmetic.
Common autosampler formats and what they demand
- Agilent 7693A / 7683B (and many OEM equivalents): 2 mL, 12 x 32 mm vial, 11 mm crimp or 9 mm screw thread. The standard tray holds 100 vials in the 7693A configuration. Crimp caps need a 11 mm crimper set to the right jaw depth.
- Shimadzu AOC-20i / AOC-20s: 2 mL, 12 x 32 mm. Screw-top 9 mm is common; the tray gripper is less forgiving of over-tightened caps than people expect.
- Thermo TriPlus / AI/AS 1310: 2 mL, 12 x 32 mm, 9 mm screw or 11 mm crimp depending on the tray insert. Check the tray insert part number before you standardize.
- Headspace (Agilent 7697A, Thermo HS): 10 mL or 20 mL vials, 22.5 x 46 mm or 23 x 75 mm, with 20 mm crimp caps. These are a different animal and should never share a purchase order line with 2 mL vials.
If your lab runs multiple platforms, standardize on 12 x 32 mm, 9 mm screw-thread where the instrument allows it. Screw thread removes the crimper variable entirely, and in a multi-user lab that is worth more than the per-unit savings on crimp vials. Where crimp is required (headspace, some older autosamplers), keep a dedicated crimper and a torque/depth check in the SOP.
Glass chemistry: the decision most buyers get wrong
There are three glass types you will actually be quoted, and they are not interchangeable for trace work.
Type I borosilicate (clear and amber)
This is the default for GC. Low alkali, low extractables, good thermal shock resistance. For most volatile and semivolatile methods, clear Type I borosilicate at 1.0 to 1.2 mm wall thickness is correct. Amber Type I is the same glass with an iron oxide colorant and is the right choice for light-sensitive analytes (many pesticides, some vitamins, nitroaromatics).
The cost difference between clear and amber is small, typically 10 to 20% at volume. If you have any doubt, buy amber. You cannot un-photodegrade a sample.
Deactivated (silanized) glass
For polar or active analytes (phenols, amines, some pharmaceuticals), a deactivated surface reduces adsorption and tailing. I specify deactivated vials for any method where the tailing factor on a polar probe exceeds 1.5 and the column is already known good. The premium is roughly 2 to 3x standard glass, so use it where the data justify it, not as a default.
What to avoid
Do not buy soda-lime “GC vials” from unbranded sources. The alkali leaching is real, and it shows up as ghost peaks and drifting blanks, especially with aqueous or acidic samples. If the certificate of analysis does not name the glass type, ask for it, and if they cannot produce it, walk away. This is the same discipline I apply when sourcing a reagent bottle: the material spec is the first question, not the last.
Capacity, geometry, and the fill-volume rule
The 2 mL vial is standard, but the usable volume is not 2 mL. A 12 x 32 mm vial with a 9 mm neck holds about 1.5 mL comfortably and should be filled to no more than 1.0 to 1.2 mL for autosampler safety. Overfill and you risk the needle hitting liquid on the way in, which produces carryover and, on some trays, a bent needle.
For limited sample, use a 300 µL or 400 µL insert (glass or polymer) inside a standard 2 mL vial. The insert concentrates the sample at the bottom where the needle reaches. Two cautions:
- Polymer inserts are fine for most GC work but can adsorb very hydrophobic analytes. Glass inserts are safer for trace semivolatiles.
- An insert adds a second surface and a second failure point (it can ride up if the cap is loose). Check insert seating on the first vial of every tray.
If you are choosing between formats, this is also where the HPLC autosampler vial decision overlaps: many labs keep one 12 x 32 mm footprint across both LC and GC, which simplifies purchasing and tray loading. That is a legitimate reason to standardize, as long as the GC method does not need a crimp or headspace format.
Septa: the part that actually fails
I will say it plainly: the septum is the most important component in the whole assembly, and it is the one most buyers treat as an afterthought. It is the only barrier between your sample and the atmosphere, and it is punctured every single injection.
Septum materials and when to use them
- Silicone (pure): excellent reseal, low bleed, but poor puncture resistance. Good for low-injection-count methods and headspace. Temperature ceiling around 200 °C for continuous use.
- Silicone/PTFE faced: the workhorse. PTFE face on the sample side reduces interaction; silicone provides reseal. Rated to about 250 °C. Use for most split/splitless GC.
- Butyl / bromobutyl: better gas barrier and lower permeability for headspace and volatile work, but higher bleed and less reseal. Rated around 120 to 150 °C. Do not use for high-temperature injections.
- PTFE/silicone with cross-linked silicone: higher puncture count, better for long sequences. Premium price, worth it on 100+ injection runs.
The puncture-count specification
Manufacturers quote a puncture count, but read the fine print: it is usually measured with a specific needle gauge (often 22 or 23 gauge) and a specific injection volume. A septum rated for 100 punctures with a 22-gauge needle may fail at 60 with a 26-gauge needle, because the smaller bore cores more easily. My rule of thumb:
- 23-gauge needle, 1 µL injection: replace septum every 50 to 75 injections.
- 26-gauge needle (typical for 10 µL syringes): replace every 30 to 40 injections.
- Headspace 20 mm septum: replace every 20 to 30 pressurization cycles, or per run if the method is short.
Put the replacement interval in the SOP. It is cheaper than a re-run.
Pre-slit vs solid
Pre-slit septa reduce coring and needle drag, and they are a good choice for high-throughput trays. The trade-off is a slightly higher leak rate and faster volatilization of very light analytes. For methods with analytes below about C6, I stay with solid septa and accept the coring risk in exchange for a tighter seal.
Caps, crimp vs screw, and the torque numbers
This is where a lot of labs quietly lose repeatability.
Screw thread (9 mm)
Screw caps are the default for good reason. No crimper, no jaw alignment, and resealable. But “hand tight” is not a specification. Over-tightening deforms the septum and can crack the neck; under-tightening leaks. I specify 0.8 to 1.2 N·m with a calibrated torque driver for critical work, and for routine work I train analysts to stop at the first firm resistance. If you use an autosampler that torques caps (some do), follow the instrument manual exactly.
Screw caps come in two thread standards: 9 mm short thread and 9 mm long thread. They are not interchangeable. Long-thread caps on short-thread vials will not seal. Check the vial part number against the cap part number before you release a purchase order.
Crimp (11 mm and 20 mm)
Crimp is still required for headspace (20 mm) and is common on older autosamplers (11 mm). The failure modes are mechanical:
- Under-crimp: loose seal, volatile loss, and the vial can lift in the tray. Symptom: low response on early-eluting peaks.
- Over-crimp: cracked neck or deformed septum. Symptom: intermittent leaks, sudden ghost peaks, and sometimes a shattered vial in the tray.
- Wrong jaw depth: the cap sits high and the needle hits the aluminum skirt. Symptom: bent needles and a frustrated analyst.
Set the crimper per the manufacturer’s gauge (Agilent publishes the jaw settings for its 11 mm and 20 mm crimpers), and check the first three vials of every tray by hand. A properly crimped 11 mm cap should not rotate freely and should not show a visible gap between cap and vial shoulder.
Cap material
Aluminum caps are standard. Magnetic caps (for autosamplers with magnetic grippers) are a different part and cost more. If your tray uses magnets, buy magnetic caps; do not try to adapt standard caps. This is one of the most common ordering mistakes I see.
A buying checklist with numbers you can put on a PO
Here is the specification sheet I actually use. Copy it into your requisition.
| Parameter | Specification | Why it matters |
|---|---|---|
| Format | 12 x 32 mm, 2 mL | Fits the vast majority of GC autosamplers |
| Glass | Type I borosilicate, clear or amber | Low extractables, low alkali leaching |
| Wall thickness | 1.0 to 1.2 mm | Balance of strength and heat transfer |
| Neck / thread | 9 mm short thread (or 11 mm crimp) | Match to cap and autosampler |
| Septum | Silicone/PTFE, 250 °C rated | Reseal and low bleed for split/splitless |
| Puncture rating | ≥ 100 punctures at 23 gauge | Set replacement interval in SOP |
| Cap torque (screw) | 0.8 to 1.2 N·m | Prevents leaks and neck cracks |
| Fill volume | 1.0 to 1.2 mL max | Avoids needle contact and carryover |
| Certification | CoA naming glass type and lot | Traceability and method validation |
| Packaging | Cleanroom or low-particulate bag | Reduces background contamination |
For headspace, change the format to 20 mL, 23 x 75 mm, 20 mm crimp, septum to butyl or PTFE-faced silicone rated for the method temperature, and crimp with the 20 mm jaw set. Do not mix headspace and liquid-injection vials on one PO line; the receiving clerk will not catch it and your analyst will.
Operational precautions that save sequences
Most vial failures are process failures, not product failures. These are the controls I insist on in any lab I run.
- Lot tracking. Record the vial and septum lot on the run sheet. When a method drifts, you can rule out a bad lot in minutes instead of days.
- First-vial check. Inspect the first vial of every tray for cap seating, septum condition, and fill level. It takes 30 seconds and catches most mechanical problems.
- Needle inspection. A bent or burred needle cores septa. Inspect weekly, and replace at the first sign of a hook or burr.
- Temperature discipline. Do not exceed the septum temperature rating. If your inlet is at 280 °C and your septum is rated to 250 °C, you have a bleed source. Match them.
- Solvent compatibility. Check that the sample solvent does not attack the septum (some chlorinated solvents and strong acids will). For aggressive matrices, use PTFE-lined caps and consider a different sample path.
- Storage. Keep vials and septa in sealed bags away from solvent vapors. A septum that has absorbed lab air will bleed for the first few injections.
Troubleshooting checklist
When a GC sequence goes sideways and the column and inlet are clean, work through this list before you touch the instrument.
Symptom: ghost peaks or rising baseline
- Septum past its puncture interval. Replace and re-run a blank.
- Septum temperature rating below inlet temperature. Check the datasheet.
- Vial lot with high extractables. Run a solvent blank from a new lot.
- Cap not sealing (under-torqued or wrong thread). Inspect and re-cap.
Symptom: low response on early-eluting peaks
- Loose crimp or screw cap. Volatiles escaped before injection.
- Pre-slit septum leaking light analytes. Switch to solid septum.
- Over-filled vial causing needle contact. Reduce fill to 1.0 mL.
Symptom: carryover between injections
- Needle contacting liquid. Check fill volume and insert seating.
- Septum coring leaving particles in the sample. Inspect the septum and needle.
- Dirty vial from a non-certified supplier. Switch to a CoA-backed lot.
Symptom: bent needles or tray errors
- Wrong cap type (magnetic vs standard) for the tray gripper.
- Over-crimped cap with a high skirt. Re-set the crimper jaw depth.
- Insert riding up. Check insert diameter against vial ID.
Where to buy, and what to ask
Price per vial is a poor metric on its own. A vial that costs $0.30 but fails one in 50 injections costs you far more in re-runs, analyst time, and delayed release than a $0.60 vial that fails one in 500. I evaluate suppliers on four things: glass type on the CoA, septum specification with a stated temperature rating, lot traceability, and whether they can hold a consistent thread standard across lots.
For the GC side, the GC vial range at gcvialfactory.com is the reference I use for format and septum options, and it is where I check thread and neck dimensions against instrument manuals. For cross-platform standardization, the sample vial pricing and format pages are useful for comparing 12 x 32 mm options across LC and GC. For the authoritative instrument-side specifications, I keep the Agilent chromatography consumables and columns pages and the Thermo Fisher chromatography and sample handling documentation bookmarked, because the autosampler manual is the final word on tray geometry. For method context, the U.S. EPA SW-846 test methods and the Restek technical resources are where I check sample preparation and injection requirements before I write a spec.
Recommendation
For a general-purpose GC lab running split/splitless with 23-gauge needles, I would standardize on 2 mL, 12 x 32 mm, Type I borosilicate, 9 mm short-thread screw vials with silicone/PTFE septa rated to 250 °C, filled to 1.0 to 1.2 mL, torqued to 0.8 to 1.2 N·m, and septa replaced every 50 to 75 injections. For headspace, use 20 mL, 23 x 75 mm, 20 mm crimp with butyl or PTFE-faced silicone septa and a calibrated 20 mm crimper. For polar analytes that tail above 1.5, add deactivated vials as a separate line item. Buy on CoA and lot traceability, not on case price, and put the septum replacement interval in the SOP where it belongs.
The vial is the cheapest component in the method and the one most likely to ruin a sequence. Specify it like it matters, and your analysts will spend their Fridays doing chemistry instead of chasing ghost peaks.
References & further reading
Related resources from our lab consumables network:
- Gc Vial at gcvialfactory.com
- Reagent Bottle at reagentbottleforsale.com
- Hplc Autosampler Vial at hplcautosamplervials.com
- Sample Vial at samplevialprice.com
External references and standards: